Struggling with your client’s hair system installation? Fear not! This guide will walk you through every step with helpful industry tips. Let’s dive in, shall we?
Step 1: Shave or Trim Your or Your Client’s Hair
Before you even think about the hairpiece, you need to get that scalp prepped! No, it’s not a battle with your client’s hairline, it’s about ensuring the hair system sticks properly. Trim or shave the area where the hairpiece will sit securely. You don’t want any stray hairs getting in the way.
Pro Tip: A clean surface means better adhesion—so don’t skip this part! Clean the client’s scalp thoroughly. Shampoo, rinse, and dry. It’s essential to get rid of oils, dirt, and styling products that could mess with the adhesive. Think of it as prepping a canvas before painting—it’s all about the details. However, if the client is totally scared about a bald dome, and doesn’t want to shave. Contact Newtimes Hair They are a leading hair manufacturer, and can add clips to the hair system for less than $50.
Step 2: Cut the Base to Size
Cutting the base of a hair system to size might seem a bit intimidating at first, but don’t worry, you’ve got this. Just remember, heads come in all shapes and sizes, so getting the right fit is essential.
Tip: Before you start cutting, pull the hair back so it’s out of the way, then carefully follow your marked line. Take your time—go slow, and avoid rushing, so you get a clean, precise cut.
Step 3: Mark the Hairline
Let’s get precise! Take a marker or eyebrow pencil and outline where your client’s natural hairline should be. This is your guide, so you don’t end up with a hairpiece sitting too high or too low.
Pro Tip: Get help from your assistant or a friend if you’re worried about getting it wrong. The last thing you want is a lopsided hairline!
Step 4: Prepare the Adhesive or Tape
Now, let’s talk about the fun part: sticking it down. You’ve got options here—tape, glue, or both.
- Tape:Quick, easy, and effective for the perimeter, applicable for all hair system bases, especially for mono or lace hair systems.
- Glue:Ideal for a firmer hold, especially for thin skin hair systems.
Depending on your preferences, apply the tape around the edges or smear some glue on your client’s scalp. If you’re using glue, don’t rush—wait for it to get tacky (about 30 seconds). This is crucial, so the hairpiece doesn’t slide around like an ill-fitting hat.
Pro Tip: Use tape for the perimeter and glue for the front for a long-lasting, strong hold.
Step 5: Attach the Hairpiece
Okay, this is where it gets real. Gently lower the hairpiece onto your client’s scalp, starting from the front. Press down firmly but gently, making sure it’s sitting in place.
Pro Tip: Don’t press too hard at first—give it a little time to settle and bond. A good 30 seconds of gentle pressure should do the trick.
Step 6: Secure the Hairpiece
After the piece is attached, press down a little more to make sure everything is secure. At this point, you can do a little victory dance (we won’t judge), but make sure it’s properly aligned.
Pro Tip: If the hairpiece has any adjustable straps or clips, now’s the time to secure them for a snug fit.
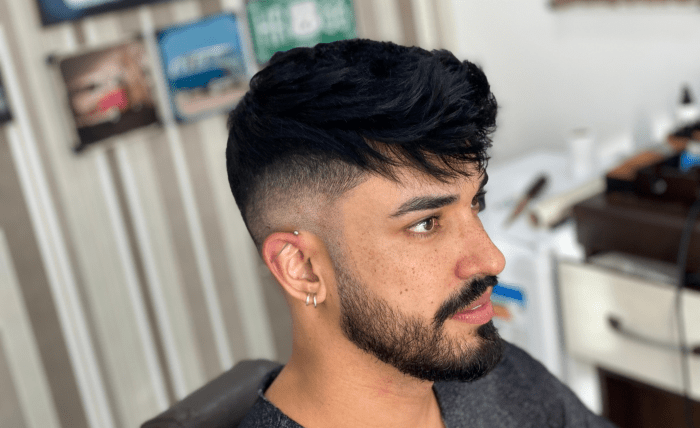
Step 7: Style the Hair System
It’s time to show off that new look. Comb, style, or trim the hair system to match your client’s desired look. Whether he’s going for sleek and sharp or relaxed and tousled, styling makes all the difference.
Pro Tip: Keep a bit of styling gel or hair spray on hand for those moments when you need to perfect that style.
Bonus Tip: Maintenance Matters
You’ve got the hair system on point, but remember: maintenance is key to keeping it looking fresh. Wash it regularly, avoid heavy products, and follow the manufacturer’s instructions on removal and cleaning.
Why Hairpiece Installation Is Easy with Practice
Installing a toupee might seem like a daunting task at first, but with a little patience and practice, you’ll be a pro in no time. The first few times may take a bit longer, but soon enough, you’ll be installing your hair system like a seasoned stylist.
Final Thoughts: Get Ready to Rock That New Look
Now that you know the step-by-step process of installing a men’s hairpiece, it’s time to put it to work. Remember, the key to success is patience, a clean surface, and the right adhesives. Follow this guide, and your client will have a flawless, natural-looking hairpiece in no time.
Frequently Asked Questions (FAQ)
- How long does it take to install a hairpiece?
- It usually takes about 30 minutes to an hour, depending on your skill level. With practice, you’ll be able to do it in less time.
- Can I wear a hairpiece every day?
- Yes! Hairpieces are designed for everyday wear, but proper maintenance and regular cleaning will keep it looking fresh.
- What’s better, tape or glue?
- It depends on your personal preference. Tape is quicker and easier, while glue offers a stronger hold for longer-lasting wear.
- How do I maintain my hairpiece?
- Regular cleaning, gentle washing, and using the right products are key to maintaining your hairpiece.
Conclusion: Master the Art of Hairpiece Installation
Whether you’re trying to add volume or cover thinning hair, installing a men’s hairpiece doesn’t have to be a stressful experience. Follow these steps, and soon you’ll be rocking a flawless hair system that looks natural, feels comfortable, and boosts your confidence. So go ahead—give it a try and transform your look today!